Insert Injection Molding: Process, Benefits, Limits, Applications, and Design Guidelines
Insert injection molding is a manufacturing process that combines pre-placed inserts with molten plastic inside the mold to produce an integrated part in a single molding cycle. For engineers and sourcing teams, the process offers a practical way to improve functional integration, reduce secondary assembly, and achieve better assembly consistency when metal and plastic need to work as one component.
In industrial products, inserts can be made from metal, glass, fiber, paper, rubber, wood, wire, preformed plastic parts, and other materials, although metal inserts are by far the most common. Typical examples include threaded features, terminals, electrodes, reinforcement elements, and sealing-related hardware. Compared with post-molding installation methods, insert molding can improve retention force, reduce assembly steps, and support more compact product architecture when the design is properly engineered.
This article explains the concept of insert molding, its main advantages and limitations, common application areas, practical DFM considerations, and design guidance for threaded inserts and molded-in nuts.
Typical insert molding setup with a pre-positioned insert before plastic injection.

What Is Insert Injection Molding?
Insert injection molding, often referred to simply as insert molding, is the process of fixing an insert in a defined location inside an injection mold and then injecting plastic around it. After cooling, the molded resin mechanically locks or encapsulates the insert, creating a single part with embedded functional features. This approach is widely used when plastic alone cannot provide the required thread strength, conductivity, wear resistance, magnetic response, or structural rigidity.
From a production standpoint, there are two main ways to place the insert in the mold:
- Manual placement: suitable for low-volume production, pilot runs, or parts with complex insert geometry. The trade-off is longer cycle time and greater dependence on operator consistency.
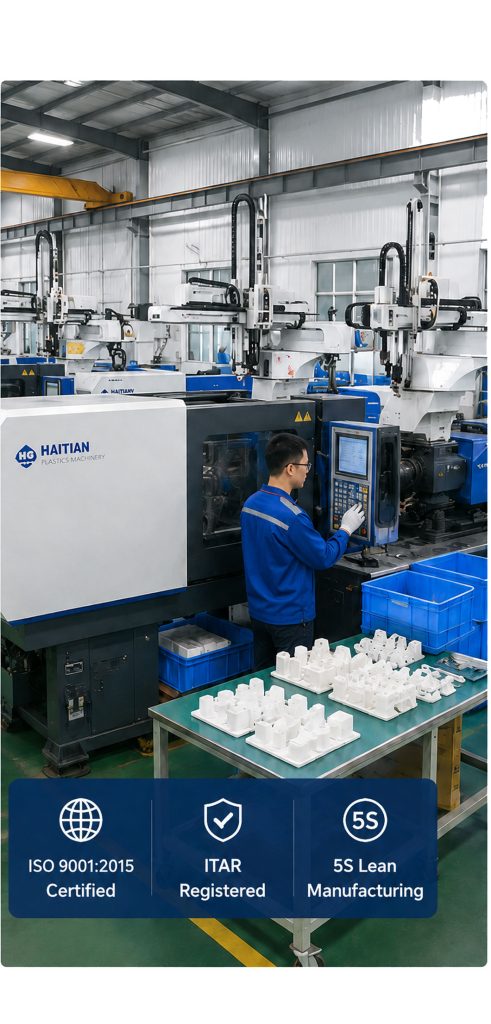
- Automated placement: preferred for higher-volume programs. Robotic or dedicated feeding systems can reduce human error, improve insert positioning repeatability, shorten cycle time, and support more stable process capability.
Where volumes justify tooling and automation investment, automated insert loading is usually the more robust route for production programs requiring stable quality and traceable output. For readers evaluating service options, DTG also provides a dedicated Insert Injection Molding service page with additional process information.
Advantages of Insert Molding
Insert molding is often selected not because it is simpler than standard molding, but because it enables functions that would otherwise require extra assembly operations or more complex part architecture. Its benefits are especially relevant in electrical products, connectors, automotive subcomponents, and compact housings.
- Combines complementary material properties: plastic contributes moldability, insulation, and design freedom, while metal contributes stiffness, strength, thread durability, and heat resistance.
- Supports miniaturization and weight reduction: integrated metal-plastic construction can reduce total part count and make compact assemblies easier to realize.
- Improves functional integration: electrical conductivity, fastening capability, wear surfaces, and magnetic or shielding functions can be incorporated directly into the molded part.
- Enhances structural performance: metal inserts can reinforce localized high-load areas and reduce the risk of thread failure in repeated assembly.
- Reduces secondary operations: compared with hot staking, welding, riveting, or separate fastener installation, insert molding can shorten downstream assembly time and reduce handling steps.
- Broad insert compatibility: the process is not limited to metal. It can also be used with wires, coils, paper, fabric, glass, rubber, and preformed plastic subcomponents where process conditions allow.
- Supports sealing and integrated subassemblies: in some applications, molding onto a rigid substrate or flexible sealing element can simplify later assembly and improve sealing reliability.
- Can provide higher reliability than press-in methods: because molten plastic forms around the insert, the design can often use narrower clearances and achieve better resistance to vibration or loosening when the interface is well designed.
- Can encapsulate fragile components: with the right resin choice and molding conditions, sensitive inserts such as coils, glass elements, or electrical components may be fixed and protected inside the plastic body.
- Enables full encapsulation when required: with appropriate mold design, the insert can be entirely enclosed by resin.
- Works well with automation: vertical molding machines, robots, and insert feeding systems can be combined for efficient production once the product and tooling are optimized for automated handling.
Limitations and Engineering Risks
Insert molding also introduces process and design risks that should be reviewed early in DFM. Many production issues come not from the molding machine itself, but from the interaction between insert geometry, resin flow, mold support, and thermal behavior.
| Issue | Technical Impact | Typical Concern for Projects |
|---|---|---|
| More complex tooling | Additional locating and sealing features are required in the mold | Higher mold cost and longer development effort |
| Longer cycle time | Insert loading and thermal stabilization may extend the molding cycle | Lower productivity if automation is not implemented |
| Thermal expansion mismatch | Different shrink and expansion behavior can generate internal stress | Cracking, stress whitening, or long-term durability concerns |
| Part deformation | Localized heat sink and asymmetric shrinkage may distort the part | Reduced dimensional stability and fit-up problems |
| Insert movement during injection | Flow impact can shift or deform the insert if it is not supported correctly | Functional failure, cosmetic defects, scrap |
| High scrap cost | Missing insert, short shot, or insert mislocation usually means the full part is rejected | Material and hardware loss on each defect |
| Recycling difficulty | Permanent combination of materials complicates separation | End-of-life handling becomes more difficult |
Thermal expansion mismatch is one of the most important technical considerations, especially in threaded insert injection molding and molded-in nuts. As the assembly cools, the insert and the surrounding polymer contract at different rates. If the wall design, insert shape, or material choice is not well balanced, the result may be internal stress, cracking, deformation, or reduced retention performance.
Thermal mismatch can lead to stress concentration and cracking around molded-in inserts.

Asymmetric shrinkage around inserts can affect dimensional stability and cause warpage.

Where Insert Molding Is Commonly Used
Insert molding is widely used in automotive, medical, electronics, connector, and industrial device applications. Common parts include sensor housings, terminal blocks, threaded bosses, sealing interfaces, handheld enclosures, and electromechanical subassemblies. The process is particularly valuable where electrical and mechanical functions must be integrated into one molded component without compromising assembly efficiency.
In commercial programs, metal insert injection molding is frequently used for threaded connections, electrical terminals, wear-resistant contact points, and reinforced joining areas. A representative example can be seen in this handheld scanner housing insert injection molding case, where insert integration supports both structural and functional requirements.
Insert molding is widely applied in automotive, medical, electronics, and connector components.

Insert Injection Molding Design Guidelines
Successful insert molding depends heavily on DFM. It is not enough to define an insert and place it into a plastic part. The insert geometry, plastic wall layout, support method, flow path, and tool structure all need to be reviewed together. This is equally important in general insert molding and in more specific cases such as cavity insert injection molding, where tooling details and part-to-mold relationships directly affect manufacturability.
1. Select insert materials with both function and process in mind
Possible insert materials include brass, aluminum, steel, ceramic, glass, plastic, and dissimilar preformed components. In many industrial programs, brass is a preferred option because it offers corrosion resistance, machinability, and relatively balanced cost. Material selection should also consider thermal expansion mismatch, surface finish, corrosion exposure, and the required retention mechanism.
2. Favor round or axisymmetric insert shapes where possible
Round and axisymmetric shapes generally support more uniform shrinkage and reduce local stress concentration. Sharp corners and pointed features should be avoided where possible because they increase the risk of stress concentration in the surrounding resin.
3. Design the insert itself for manufacturability
Metal inserts are often made by machining, stamping, or cold forming. The insert should therefore be reviewed not only for part function but also for cost-effective manufacturing, dimensional repeatability, and surface features that support stable overmolding behavior.
4. Make locating features simple and robust
The portion of the insert used for placement and positioning in the mold should preferably be cylindrical or otherwise easy to reference. Round locating geometry simplifies mold machining and helps improve repeatable insert positioning.
5. Add sealing or anti-flash features where needed
If molten resin can escape along the insert interface, flash or contamination may occur around the visible insert area. Proper shoulders, sealing lands, and mold support features can reduce this risk.
6. Maintain enough resin below the insert
A common guideline is to keep the minimum distance from the insert base to the nearest plastic wall greater than T > D/6, where D is the effective insert diameter. If the resin section under the insert is too thin, sink-like waviness, local weakness, or surface read-through may occur.
Minimum resin support below the insert is important for appearance and structural integrity.

7. Keep adequate distance from side walls
The gap between the insert and the product side wall should not be too small. The mold still requires enough steel support, and the plastic needs enough section thickness to avoid weak areas or fill-related instability.
8. In bosses, extend the insert deep enough for stable anchoring
When the insert is molded into a boss, it should normally extend toward the bottom of the boss while maintaining the required minimum bottom thickness. Rounded insert ends can help reduce stress concentration and improve resin flow around the insert tip.
9. Use mechanical retention features appropriate to insert type
Small cylindrical inserts can use center slots or diamond knurling to improve retention. Knurled groove depth is often kept in the 1 to 2 mm range depending on size and application. Flat inserts may use holes, windows, bends, or cutouts. Rod-shaped inserts can use flattened ends, notches, bends, or split features. Tubular stamped inserts can incorporate bulged sections to improve retention force.
10. Pay special attention to terminal retention in connectors
For connector and terminal applications, retention design is a priority. Common methods include perforated terminals, non-round terminal profiles, bent geometry, increased surface roughness, embossments, and localized wall-thickness reinforcement in the surrounding resin. If your project is focused specifically on metallic hardware, DTG also offers a dedicated Metal Insert Molding service page for this application scope.
Need DFM Input Before Tooling?
For insert-molded parts, early review of insert geometry, wall thickness, gate strategy, retention details, and tolerance stack-up can prevent expensive mold changes later. If you are evaluating a new component or troubleshooting an existing design, a structured DFM review is often the fastest way to reduce risk.
Design Guidelines for Molded-In Nuts and Threaded Inserts
Molded-in nuts are among the most common insert types. However, the nut and the surrounding plastic boss must be designed as a system. Otherwise, problems such as low pull-out force, insufficient torque resistance, boss cracking, resin flash, or unstable assembly performance can occur.
Three common methods for embedding threaded inserts
There are three widely used methods for placing threaded metal inserts into plastic parts:
- Heat staking / thermal insertion: the most common general method, usually done with a heat staking machine or soldering-iron type tool.
- Molded-in insertion: the insert is fixed on a mold pin and encapsulated during injection molding. This method places tighter requirements on boss hole dimensions and insert location control.
- Ultrasonic insertion: ultrasonic vibration generates heat through friction, softening the plastic and allowing the insert to be pressed into place before cooling and solidification.
Each method has its own use case. The discussion below focuses on molded-in threaded inserts and nuts used in insert molding.
Typical external structure of a molded-in threaded insert or nut.

Representative size options for molded-in nut inserts.
Boss design and nut selection
The basic dimensions of the insert and the plastic boss must match correctly. Several dimensions are especially important:
- d: the pilot or guiding section at the bottom of the nut. This should be slightly smaller than the corresponding boss inner diameter to allow reliable pre-positioning.
- D: the outer diameter of the nut body. This works with the boss inner diameter C. In many consumer electronics type designs, the plastic inner diameter is often around 0.25 to 0.30 mm smaller than the metal outer diameter, though the exact interference must be validated by material and process.
- L: insert length. This should match the boss hole depth Y, while leaving additional depth, often about 0.5 to 1.0 mm, as resin reserve space.
- W: wall thickness around the boss. In many cases, wall thickness of 0.8 to 1.0 mm or above is used as a starting point, with larger inserts requiring larger surrounding sections.
Dimensional relationship between threaded insert geometry and plastic boss design.

Typical wall thickness and hole size reference for molded-in threaded insert bosses.

Common problems and practical solutions
| Problem | Likely Cause | Engineering Response |
|---|---|---|
| Low pull-out or torque resistance | Boss hole too large, insufficient resin engagement with knurled or patterned area | Tighten boss diameter control and review insert surface geometry |
| Resin flash or boss cracking | Boss hole too small, excessive interference or poor resin displacement path | Increase clearance appropriately and optimize insert entry geometry |
| Adequate nominal dimensions but unstable retention | Insufficient effective engagement length or short knurled segment | Increase boss depth above 2.5 mm and use insert length above 2.0 mm where feasible |
| Poor torque resistance with shallow bosses | Too little plastic engaged with the patterned retention area | Consider changing from a double-pattern type to a single-slant pattern with deeper engagement |
| Flash near insert ends and poor appearance | Insert shape expands and contracts too abruptly, restricting resin flow | Add a guided locating section and smoother transition geometry for resin redistribution |
One frequent problem in molded-in nuts is inadequate torque performance even when the nominal dimensions appear reasonable. In shallow bosses, a double-slant or short knurled area may not provide enough resin contact area. In such cases, increasing boss depth and insert length can help, but where mold modification is not convenient, changing to a single-slant retention pattern may increase the effective engagement area and improve torque resistance.
Another common issue is resin flash or local cracking near the top or bottom of the boss. This often happens when the insert profile expands too aggressively in one area and then contracts sharply in another, making resin displacement difficult during molding. A guided locating section can improve insert positioning, make loading more stable, and provide better resin distribution around the patterned zones. When those patterned zones intersect at defined angles, they can also improve resistance to circumferential torque.
Final Thoughts
Insert injection molding is a highly capable process for combining plastic and metal functions in a single component, but it requires disciplined design and process control. Insert material, shape, placement method, wall thickness, thermal behavior, and retention geometry all influence final performance. For procurement teams, the value of insert molding often comes from fewer assembly steps, improved functional integration, and better long-term consistency. For engineers, the key is balancing retention force, dimensional stability, moldability, and cycle time from the start of the design phase.
Projects involving molded-in terminals, threaded inserts, or reinforced structural points usually benefit from early discussion between product design, tooling, and molding teams. That is especially true when cosmetic requirements, electrical performance, or sealing reliability are also in scope.
Discuss Your Insert Molding Project
If you are evaluating insert molding for a new part, comparing molded-in nuts with post-installed inserts, or reviewing an existing design for manufacturability, it is worth validating the insert geometry and plastic boss layout before tooling release.