Removing supports from 3D prints is a crucial step to ensure your model looks clean and professional. Here’s a comprehensive guide on how to effectively remove supports from your 3D prints:
1. Understanding the Types of Supports
Before you begin, it’s essential to know the different types of supports:
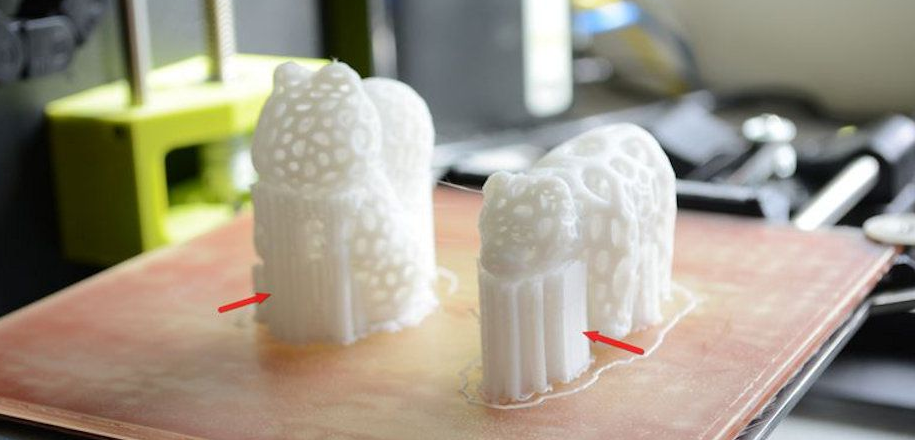
- Breakaway Supports: These are designed to be manually snapped off. They are generally easier to remove but may leave surface marks.
- Soluble Supports: These dissolve in water or a specific solvent, leaving a smoother surface but requiring additional post-processing.
2. Preparing Your Workspace
Set up a clean, well-lit workspace with all necessary tools within reach. Essential tools include:
- Pliers (needle-nose or flush-cut)
- Hobby knife or scalpel
- Sandpaper or sanding sticks
- Tweezers
- Solvent (for soluble supports)
3. Removing Breakaway Supports
- Start with Pliers: Use needle-nose pliers to gently wiggle and break off larger support structures. Start from the outside and work your way in.
- Use a Knife for Precision: For smaller, more delicate areas, use a hobby knife to carefully cut away the supports. Be cautious to avoid damaging the model.
- Sanding and Smoothing: After removing the majority of the supports, use sandpaper or sanding sticks to smooth out any rough spots or marks left by the supports. Start with a coarse grit and move to a finer grit for a polished finish.
4. Removing Soluble Supports
- Prepare the Solvent: If you’re using soluble supports (like PVA or HIPS), prepare a bath with the appropriate solvent. For PVA, warm water is usually sufficient. For HIPS, a solution of d-Limonene is used.
- Submerge the Print: Place your 3D print in the solvent bath, ensuring it is fully submerged. Leave it for the recommended amount of time, typically several hours to overnight.
- Rinse and Dry: Once the supports have dissolved, rinse the print with clean water to remove any residual solvent. Allow the print to dry completely before further handling.

Choose us for your custom injection molding needs and experience excellence in every detail. Our China-based factory provides innovative solutions, competitive pricing, and fast turnaround times. Get your custom quote now!
5. Post-Processing
- Filling and Smoothing: If there are any imperfections or gaps left by the supports, you can use a filler material to smooth these areas. Sanding can also help achieve a more uniform surface.
- Painting and Finishing: After supports are removed and the surface is smooth, you can proceed with painting or applying any other finishing touches to your model.
6. Safety Tips
- Wear Safety Gear: Always wear protective gloves and eye protection when handling sharp tools or solvents.
- Ventilation: Ensure your workspace is well-ventilated, especially when using solvents.
- Proper Disposal: Dispose of used solvents and support material according to local regulations to minimize environmental impact.
By following these steps, you can efficiently remove supports from your 3D prints, ensuring a high-quality finish that showcases your work’s detail and precision.
Related Conten: Prototype Manufacturing

