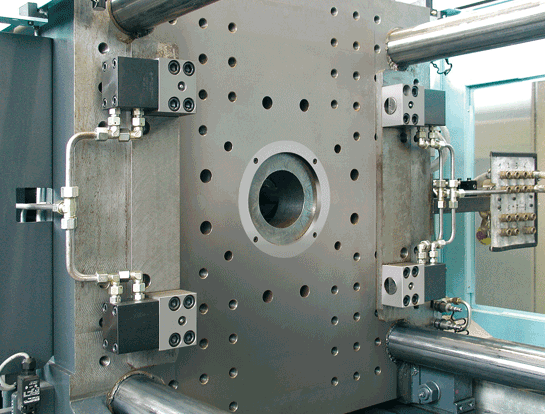
Changing an injection mold involves several steps to ensure a smooth transition from one mold to another while maintaining production efficiency and minimizing downtime. Here’s a comprehensive guide on how to change an injection mold:
Preparing for Mold Change
- Schedule Maintenance Downtime:
- Plan mold changes during scheduled maintenance windows or downtime periods to minimize production disruption.
- Coordinate with production planning and scheduling teams to ensure minimal impact on overall production schedules.
- Gather Necessary Tools and Equipment:
- Prepare all required tools and equipment for mold change, including hoists or cranes for heavy molds, wrenches, screwdrivers, mold carts, and cleaning supplies.
- Safety Precautions:
- Ensure all safety protocols are followed, including lockout/tagout procedures to isolate energy sources and prevent accidental machine activation during mold change.
[elementor-template id=”4330″]
Step-by-Step Mold Change Procedure
- Machine Preparation:
- Stop the injection molding machine and allow it to cool down if necessary.
- Clean the machine and surrounding area to remove any residue or contaminants that could affect the new mold installation.
- Remove the Current Mold:
- Open the mold clamping unit and remove any auxiliary equipment (e.g., robots, sprue pickers) attached to the mold.
- Use appropriate tools to loosen and remove bolts or fasteners securing the mold to the machine platens.
- Inspect and Clean the Machine:
- Inspect the machine platens for cleanliness and damage.
- Clean and lubricate the platens if necessary to ensure smooth installation of the new mold.
- Prepare the New Mold:
- Transport the new mold to the injection molding machine using a mold cart or hoist.
- Inspect the new mold for any damage or defects before installation.
- Install the New Mold:
- Position the new mold on the machine platens, aligning it carefully with the nozzle and sprue bushing.
- Securely fasten the mold using bolts or fasteners, ensuring even clamping force across the mold.
- Connect Auxiliary Equipment:
- Reattach any auxiliary equipment, such as robots or sprue pickers, to the new mold.
- Verify proper alignment and functionality of auxiliary components.
- Adjust Setup Parameters:
- Enter and verify mold-specific setup parameters in the machine control panel, including injection pressure, temperature profiles, and cycle times.
- Conduct dry runs or test shots to ensure proper functioning of the new mold and validate part quality.
- Run Production Tests:
- Initiate production runs with the new mold to verify part quality, dimensional accuracy, and cycle times.
- Monitor the injection molding process closely during initial production to identify and address any issues promptly.
- Document and Record:
- Maintain detailed records of mold changes, including setup parameters, test results, and any adjustments made during the process.
- Update production documentation and inform relevant personnel of the mold change completion.
Post-Mold Change Activities
- Monitor Production:
- Continuously monitor production after mold change to ensure stable operation and consistent part quality.
- Address any emerging issues or adjustments needed to optimize production performance.
- Perform Regular Maintenance:
- Schedule regular mold maintenance and cleaning to prolong mold life and prevent production disruptions.
- Implement preventive maintenance procedures to address wear and tear, lubrication, and mold storage conditions.
[elementor-template id=”4331″]
Conclusion
Changing an injection mold requires careful planning, preparation, and execution to maintain production efficiency and quality standards. By following a systematic mold change procedure and adhering to safety protocols, manufacturers can minimize downtime, optimize machine utilization, and ensure smooth transitions between different molds in injection molding operations
Related Conten: Custom Plastic Extrusions
 DTG Mould Trade Process |
|
| Quote: | According to sample, drawing and specific requirement. |
|---|---|
| Discussion | Mold material, cavity number, price, runner, payment, etc. |
| S/C Signature | Approval for all the items. |
| Advance | Pay 50% by T/T |
| Product Design Checking | We check the product design. If some position is not perfect, or can not be done on the mould, we will send customer the report. |
| Mold Processing | Send report to customer once each week |
| Mold Testing | Send trial samples and try-out report to customer for confirmation |
| Mold Modification | According to customer’s feedback. |
| Balance Settlement | 50% by T/T after the customer approved the trial sample and mould quality. |
| Delivery | Delivery by sea or air. The forwarder can be designated by your side. |
 |
|
