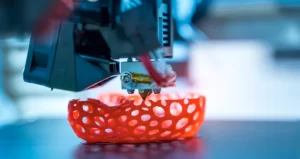
Calibrating your 3D printer is crucial for achieving high-quality prints. Proper calibration involves several steps to ensure that all components are correctly set up and functioning. Here’s a step-by-step guide to calibrate your 3D printer:
1. Bed Leveling
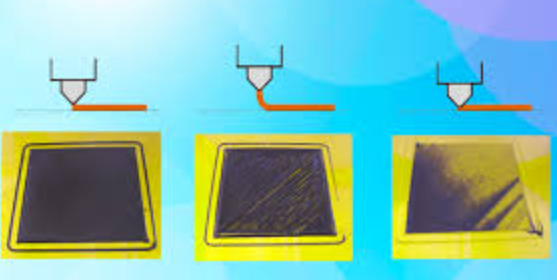
Bed leveling ensures that the print bed is perfectly parallel to the nozzle.
Manual Bed Leveling:
- Home the Printer:
- Move the print head to the home position using your printer’s control panel.
- Adjust Bed Screws:
- Place a piece of paper between the nozzle and the bed.
- Move the print head to each corner and the center of the bed, adjusting the screws until you feel slight resistance on the paper.
Automatic Bed Leveling:
- Install a Bed Leveling Sensor:
- Sensors like BLTouch or inductive sensors can automate bed leveling.
- Run Bed Leveling Procedure:
- Use your printer’s firmware to run the bed leveling procedure and save the settings.
2. Set the Z-Offset
The Z-offset is the distance between the nozzle and the bed when the nozzle is at the home position.
- Home the Printer:
- Home all axes.
- Adjust Z-Offset:
- Lower the nozzle until it is just touching the bed using the control panel.
- Adjust the Z-offset setting in your firmware or printer’s control panel until you get the desired distance (typically a piece of paper thickness).
3. Calibrate the Extruder
Extruder calibration ensures that the correct amount of filament is being fed.
- Mark the Filament:
- Mark 120mm on the filament from the point it enters the extruder.
- Extrude 100mm of Filament:
- Using your printer’s control panel, extrude 100mm of filament.
- Measure the Extruded Filament:
- Measure the remaining filament from the mark. If it’s not 20mm, adjust the extruder steps/mm in the firmware.
- Calculate the new steps/mm using the formula:


Choose us for your custom injection molding needs and experience excellence in every detail. Our China-based factory provides innovative solutions, competitive pricing, and fast turnaround times. Get your custom quote now!
4. Calibrate the E-Steps (Extruder Steps Per Millimeter)
- Calculate Current E-Steps:
- Note the current E-steps setting in your firmware.
- Perform Extruder Calibration:
- Use the calculated new steps/mm to update the firmware or control panel.
5. Calibrate the X, Y, and Z Steps Per Millimeter
Ensure that your axes move the correct distances.
- Mark and Measure:
- Mark a point on the bed and move the print head a set distance (e.g., 100mm).
- Measure the actual distance traveled.
- Adjust Firmware:
- Adjust the steps/mm settings in the firmware if the actual distance does not match the intended distance.
6. PID Tuning for Hotend and Bed
PID tuning helps maintain stable temperatures for the hotend and heated bed.
- Run PID Autotune:
- Using your printer’s control panel or terminal (e.g., via OctoPrint), run the PID autotune command for the hotend: M303 E0 S200 C8
- For the heated bed:
M303 E-1 S60 C8
- Update Firmware:
- Save the new PID values provided by the autotune process to your firmware or control panel.
7. Print Temperature Calibration
Determine the optimal print temperature for your filament.
- Print a Temperature Tower:
- Print a temperature tower model that ranges through different temperatures (e.g., 200°C to 240°C).
- Analyze Results:
- Examine the tower to determine the best temperature setting for your filament.
8. Calibrate Retraction Settings
Proper retraction settings help reduce stringing and oozing.
- Print a Retraction Test:
- Print a retraction test model to find the optimal retraction distance and speed.
- Adjust Settings:
- Adjust the retraction settings in your slicer software based on the test results.

As a leading mold injection manufacturer in China, we deliver superior molds for various industries. Our state-of-the-art facilities and expert team ensure top-notch quality and timely delivery. Contact us now for a competitive quote!
9. Calibrate Flow Rate (Extrusion Multiplier)
Ensures the correct amount of filament is extruded.
- Print a Single-Wall Cube:
- Measure the wall thickness.
- Adjust Flow Rate:
- Adjust the flow rate in your slicer settings until the wall thickness matches the intended thickness.
10. Bed Adhesion Calibration
Ensure good first-layer adhesion.
- Print a First Layer Test:
- Adjust bed temperature and first layer height settings for optimal adhesion.
By following these calibration steps, you can ensure that your 3D printer is well-tuned and capable of producing high-quality prints. Regular maintenance and re-calibration are also important to keep your printer in optimal condition.
Related Conten: 3D Printing

