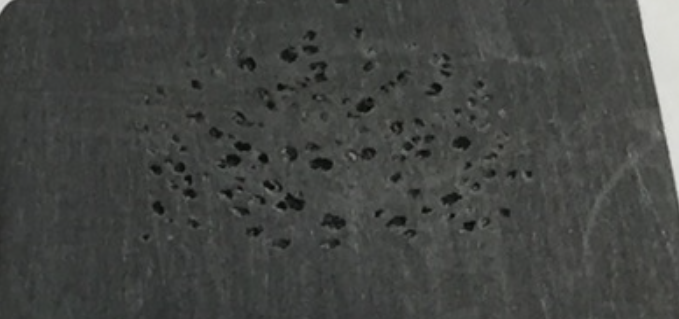
Voids in injection molded parts are unwanted hollow spaces or air pockets that can compromise the strength, appearance, and functionality of the part. Understanding the causes of voids and implementing corrective actions can help eliminate this defect. Here are the primary causes of voids in injection molding and how to address them:
Causes of Voids in Injection Molding
- Inadequate Packing Pressure
- Cause: Insufficient packing pressure during the injection molding process can result in incomplete filling of the mold cavity, leading to voids.
- Solution: Increase the packing pressure to ensure the mold cavity is fully packed and the material fills all the voids.
- Material Shrinkage
- Cause: As the material cools and solidifies, it shrinks. If the material shrinks too quickly or unevenly, it can pull away from the mold surfaces, creating voids.
- Solution: Optimize the cooling rate by adjusting mold and melt temperatures to ensure even and controlled cooling.
- Thick Sections
- Cause: Parts with thick sections are prone to voids because the material in these areas cools and solidifies more slowly, leading to shrinkage and void formation.
- Solution: Design parts with uniform wall thickness to minimize shrinkage issues. For necessary thick sections, use coring or redesign to distribute material more evenly.
- Entrapped Air
- Cause: Air can become trapped in the mold cavity if the mold is not properly vented, leading to voids.
- Solution: Improve mold venting by adding or enlarging vents in the mold cavity. Ensure vents are located in areas where air is likely to be trapped.
- Improper Material Flow
- Cause: Uneven or inadequate material flow can cause certain areas of the part to be underfilled, leading to voids.
- Solution: Adjust the injection speed and pressure to ensure even and adequate flow of material into the mold cavity.
- Insufficient Material Feed
- Cause: If the material feed is insufficient, it can lead to incomplete filling of the mold cavity, resulting in voids.
- Solution: Ensure an adequate material feed by checking the shot size and making sure there is enough material to fill the mold cavity completely.
- Mold Temperature Imbalance
- Cause: Uneven mold temperatures can cause differential cooling rates, leading to voids in certain areas of the part.
- Solution: Ensure the mold temperature is consistent and balanced across the entire mold to promote even cooling.
- Material Choice
- Cause: Some materials are more prone to voids due to their shrinkage characteristics and flow properties.
- Solution: Select materials with lower shrinkage rates and better flow characteristics for the specific part design.
[elementor-template id=”4330″]
Troubleshooting and Corrective Actions
- Increase Packing Pressure
- Action: Increase the packing pressure during the injection molding cycle to ensure complete filling and packing of the mold cavity.
- Result: Reduced voids due to better material compaction.
- Optimize Cooling Rate
- Action: Adjust the mold and melt temperatures to ensure even and controlled cooling of the part.
- Result: Minimized shrinkage and reduced void formation.
- Design for Uniform Wall Thickness
- Action: Redesign parts to have uniform wall thickness where possible. Use coring or other techniques to reduce the thickness of bulky areas.
- Result: Reduced differential cooling and shrinkage, leading to fewer voids.
- Improve Mold Venting
- Action: Add or enlarge vents in critical areas of the mold to allow trapped air to escape.
- Result: Minimized air entrapment and reduced voids.
- Adjust Material Flow Parameters
- Action: Optimize injection speed and pressure settings to ensure even and adequate flow of material into the mold cavity.
- Result: Improved material distribution and reduced voids.
- Ensure Adequate Material Feed
- Action: Check and adjust the shot size to ensure there is enough material to fill the mold cavity completely.
- Result: Complete filling of the mold cavity and reduced voids.
- Balance Mold Temperature
- Action: Ensure the mold temperature is consistent across the entire mold to promote even cooling.
- Result: Even cooling and reduced void formation.
- Select Appropriate Materials
- Action: Choose materials with lower shrinkage rates and better flow properties for the specific part design.
- Result: Reduced voids due to better material performance during molding.
[elementor-template id=”4331″]
Summary of Actions
| Issue | Cause | Solution |
|---|---|---|
| Inadequate Packing Pressure | Insufficient packing pressure | Increase packing pressure |
| Material Shrinkage | Uneven or rapid shrinkage | Optimize cooling rate by adjusting mold and melt temperatures |
| Thick Sections | Slow cooling in thick areas | Design for uniform wall thickness, use coring for thick sections |
| Entrapped Air | Poor mold venting | Improve mold venting |
| Improper Material Flow | Uneven or inadequate material flow | Adjust injection speed and pressure |
| Insufficient Material Feed | Incomplete filling of mold cavity | Ensure adequate material feed |
| Mold Temperature Imbalance | Differential cooling rates | Balance mold temperature |
| Material Choice | High shrinkage or poor flow properties | Select materials with lower shrinkage and better flow properties |
Conclusion
Voids in injection molded parts can arise from several factors, including inadequate packing pressure, material shrinkage, thick sections, entrapped air, improper material flow, insufficient material feed, mold temperature imbalance, and material choice. By addressing these issues through proper design, process optimization, and material selection, manufacturers can significantly reduce or eliminate voids, resulting in higher quality and more reliable molded parts
Related Conten: https://www.m-dtg.com/service/plastic-blow-molding/
 DTG Mould Trade Process |
|
| Quote: | According to sample, drawing and specific requirement. |
|---|---|
| Discussion | Mold material, cavity number, price, runner, payment, etc. |
| S/C Signature | Approval for all the items. |
| Advance | Pay 50% by T/T |
| Product Design Checking | We check the product design. If some position is not perfect, or can not be done on the mould, we will send customer the report. |
| Mold Processing | Send report to customer once each week |
| Mold Testing | Send trial samples and try-out report to customer for confirmation |
| Mold Modification | According to customer’s feedback. |
| Balance Settlement | 50% by T/T after the customer approved the trial sample and mould quality. |
| Delivery | Delivery by sea or air. The forwarder can be designated by your side. |
 |
|